This is the second post in the Building a Smart Mirror blog series. If you haven't read the first part, you might want to → Part 1.
In the first part, I wrote about how we got the mirror up and running - honestly the feeling of accomplishment was amazing. It was almost midnight when the mirror finally hung on the wall, so I wasn't in the exact mood of setting up the UI. I had cloned the MagicMirror repo, so running npm start ran just fine; it would open the MagicMirror UI which had its default widgets.
Using MagicMirror #
If a minimal setup is sufficient for you, cloning MagicMirror would be sufficient. Shoutout to @MichMich for the amazing project. It is open source and has several widgets that you can add to the screen by just adding a few lines to a config file.
1. Clone the repo on the Raspberry Pi
git clone https://github.com/MichMich/MagicMirror

2. Install dependencies
cd MagicMirror/
npm install

3. Run the app
npm start
When you start the app, the Pi would enter full screen mode and the default screen for MagicMirror would be visible. I has a calendar, a clock, some news and a greeting widget. This is the simplest way to get a magic mirror running. A start-up service can be created so that this app loads up on every boot, if that's what is required.
To edit the screen layout you'll have to create a config.js file inside /config directory. The repository already has a config.sample.js which can be used to extend any required widgets. Copy the contents from config.sample.js and paste them to the newly created config.js.
// Config file looks like this
var config = {
	address: 'localhost',
	port: 8080,
	ipWhitelist: ['127.0.0.1', '::ffff:127.0.0.1', '::1'],
	language: 'en',
	timeFormat: 24,
	units: 'metric',
	modules: [
		{
			module: 'alert',
		},
		{
			module: 'updatenotification',
			position: 'top_bar',
		},
		{
			module: 'clock',
			position: 'top_left',
		},
		{
			module: 'calendar',
			header: 'US Holidays',
			position: 'top_left',
			config: {
				calendars: [
					{
						symbol: 'calendar-check',
						url:
							'webcal://www.calendarlabs.com/ical-calendar/ics/76/US_Holidays.ics',
					},
				],
			},
		},
	],
};
For someone curious, MagicMirror is basically an Electron app that renders a HTML UI and displays widgets according to the config file. If you had to build this on your own, you need a simple HTML page and some proper CSS to go with it. For the ones who love frameworks, those work here too! I find using React or Vue here much benefitial because they have a large number of prebuilt components that can be added in the app.
Playing Music on the Mirror #
If you think adding Alexa brings Amazon Music with it then you are wrong. Sadly, Amazon Music can be used only in commercial Alexa apps. So the option of playing music by simply saying Alexa, play Hurricane by Thrice does not do anything except Alexa replying that Music cannot be played on this device.
Before moving to Alexa, I had initially installed Google Assistant. I think it was my preferrential choice over Alexa. But after almost 2 days of installing the right service and getting the Assistant running in dev mode, I found out that the Google Assistant Service no more supports hotword activation. This means that for non-commercial usage, one cannot wake the Assistant by just saying Ok Google. This was a bummer - I had spent a lot of time debugging, Google's SDK had been deprecated and everything worked except this final line:
googlesamples-assistant-hotword --device-model-id my-modelThis results in
Segmentation FaultLong story short, if you really want to try Google Assistant you can, but if you want hotword detection, which is required in a smart mirror, simply avoid installing Google Assistant and install Alexa instead.
Note that installing Alexa isn't required for playing music, but in the next post, Alexa is going to power our music playing tool. To skip Alexa, jump to 'Let's Play Some Music, Finally'.
Setting up Alexa #
If you search for help for installing Alexa on Raspberry Pi, one documentation will pop in the top results. I would recommend following steps I mention below for an error free installation.
- Follow the instructions as mentioned here: Register a Product
- Continue with next steps upto Input AVS Credentials
- Next, follow this article: Set Up the AVS Device SDK on Raspberry Pi. This will build the SDK on the Pi and will help you run the sample app.
While setting this up, I had initially followed the instructions in the original guide linked in point 1. The step Building the AVS SDK asks you to download a few bash files that execute the same set of commands that we did in step 3. But because of this sequential execution of commands the Rapsberry Pi gets short on memory and the process hangs at around 97% progress. This was experienced by other developers too and installing it step by step solves this problem.
Another issue I came accross was that after building the SDK and running the sample app, Alexa was detecting voice and responding, but there was no audio output. The console output looked something like this
Alexa is idle!

# When prompted 'Alexa'
Listening...

# 'What is the current weather?'
Listening...

Thinking...

Speaking...

Alexa is idle!
This meant that Alexa was actually speaking but somehow the audio wasn't audible. Once again, this is a known error and you can find it here: Issue 479. The solution to this problem is to edit a source file.
Inside your sdk-folder, look for the file MediaPlayer.cpp inside sdk-folder/sdk-source/avs-device-sdk/MediaPlayer/GStreamerMediaPlayer/src.
cd /home/pi/sdk-folder/sdk-source/avs-device-sdk/MediaPlayer/GStreamerMediaPlayer/src
nano MediaPlayer.cpp
In this file, at line number 723 change
m_pipeline.audioSink = gst_element_factory_make("autoaudiosink", "audio_sink");to
m_pipeline.audioSink = gst_element_factory_make("alsasink", "audio_sink");After this you'll have to build the SampleApp again and run it, to do this run
cd /home/pi/sdk-folder/sdk-build
make SampleApp

# After successful build run:
./SampleApp/src/SampleApp ./Integration/AlexaClientSDKConfig.json ../third-party/alexa-rpi/models
Now you can happily talk to Alexa and it will answer your queries!
Let's Play Some Music, Finally #
As we discussed above that Alexa does not bring Amazon Music with itself, we will have to do something about it ourselves. To the rescue comes Play This - a web app that lets you create a club (a group) and a playlist for the club, and several people can join the club and control the playlist and music playback.
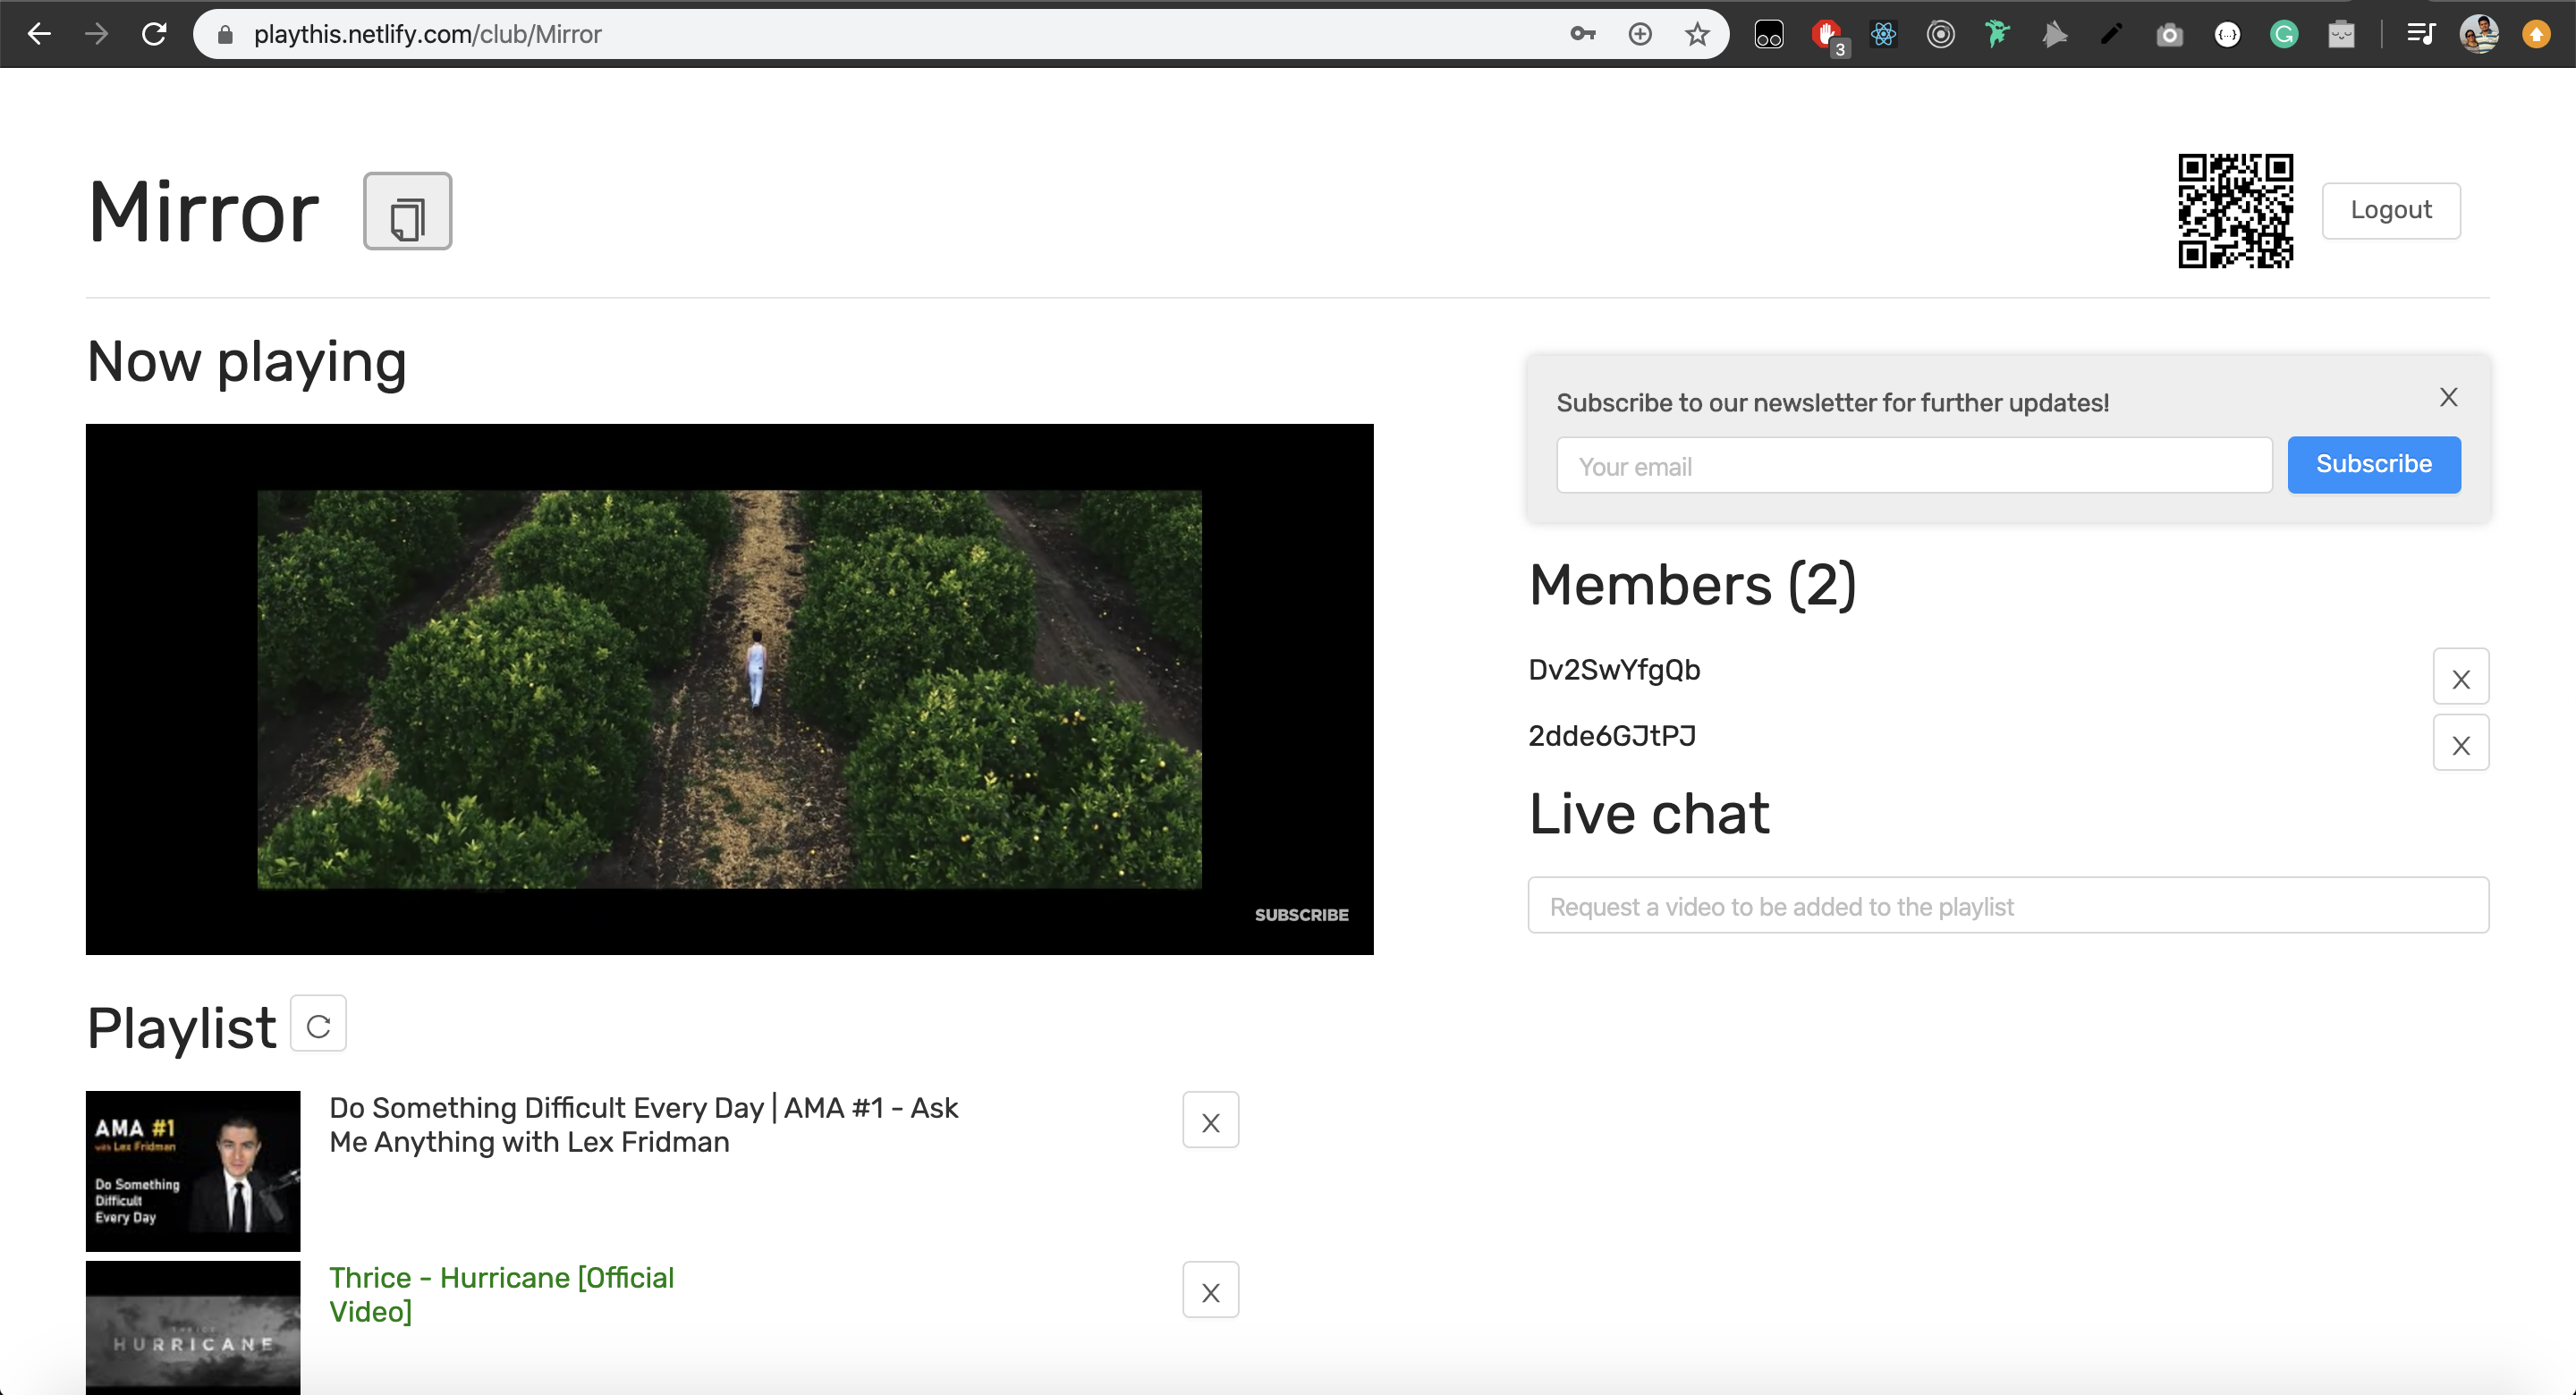
This is the original UI of Play This, and you can create a new club by simply entering a name and password. The one who creates the club has the permission to add new items to the playlist. And all others who join the club can control the current song.
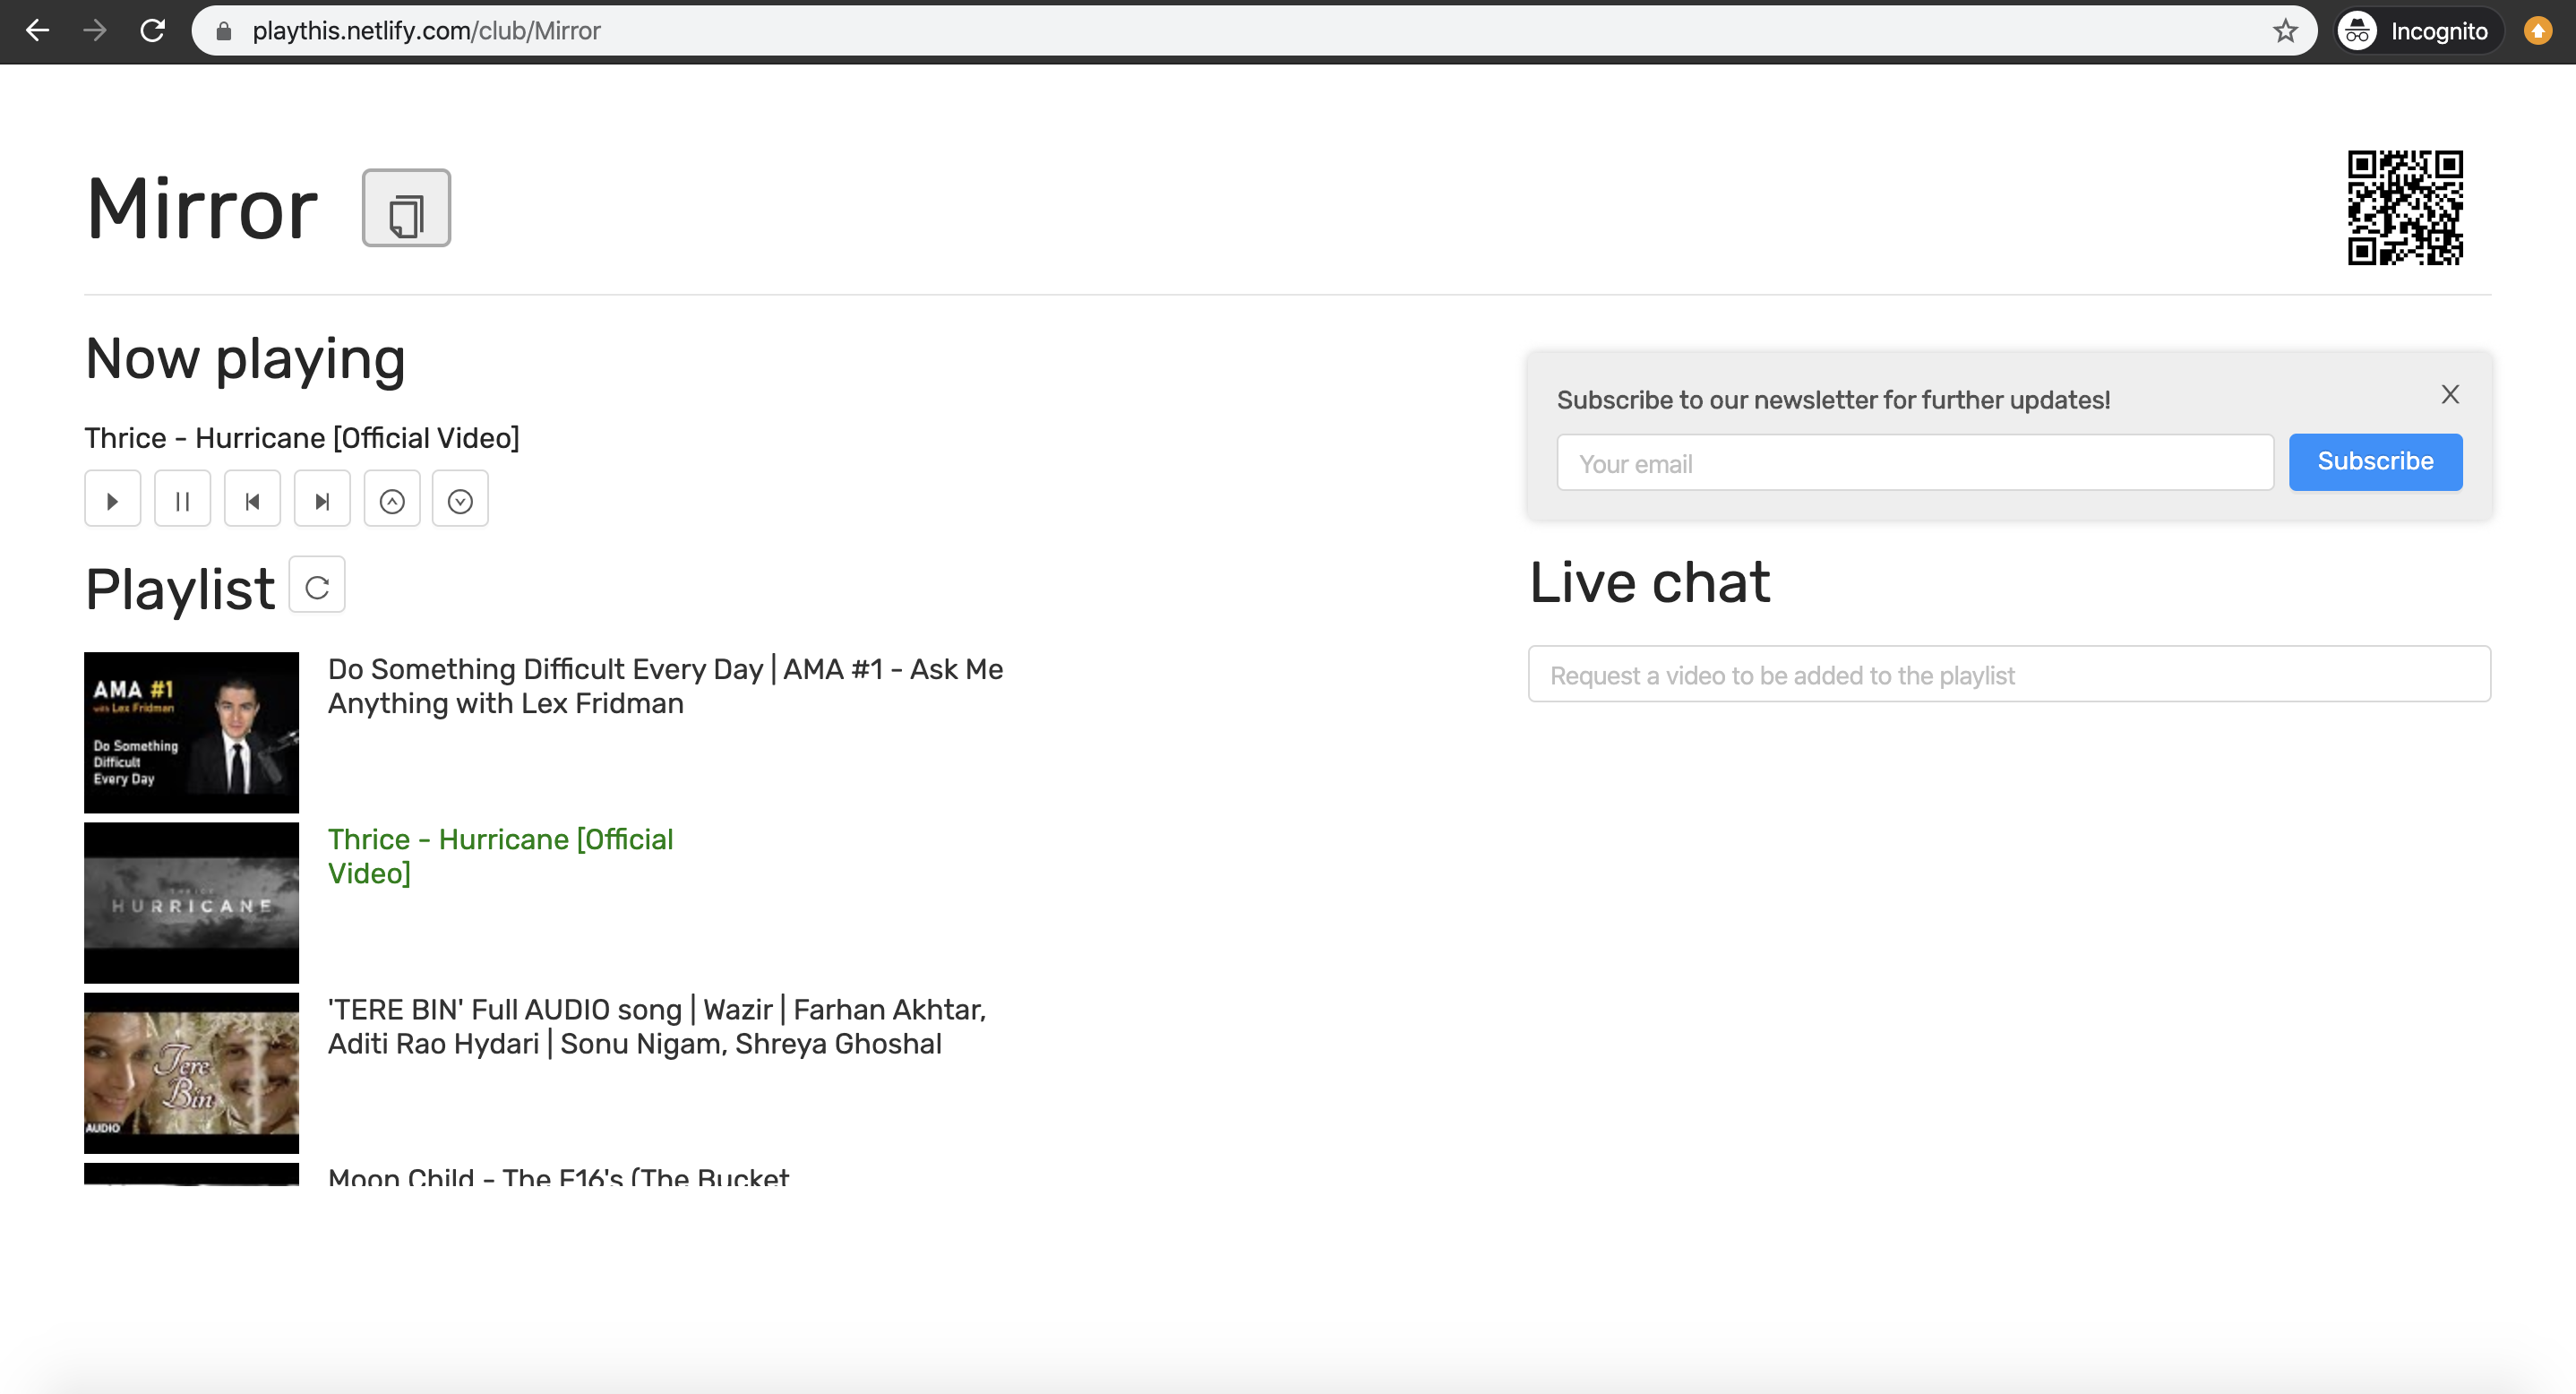
This is how the UI looks for someone who joins the club
Me and Kunal had built this in 2018, we used to play music while working at Terribly Tiny Tales and got this idea so that we could play music without needing to tell which song to play. This app is perfect for our smart mirror as we can control the music being played on it using our phone. The only thing required to be done here is tweaking some CSS. To appear beautiful on the mirror, the background of the website has to be black and text white.
I made the required changes to CSS and you can find the updated code here:
- Frontend: https://github.com/mohitk05/playthis-mirror-frontend
- Backend: https://github.com/mohitk05/playthis-mirror-backend
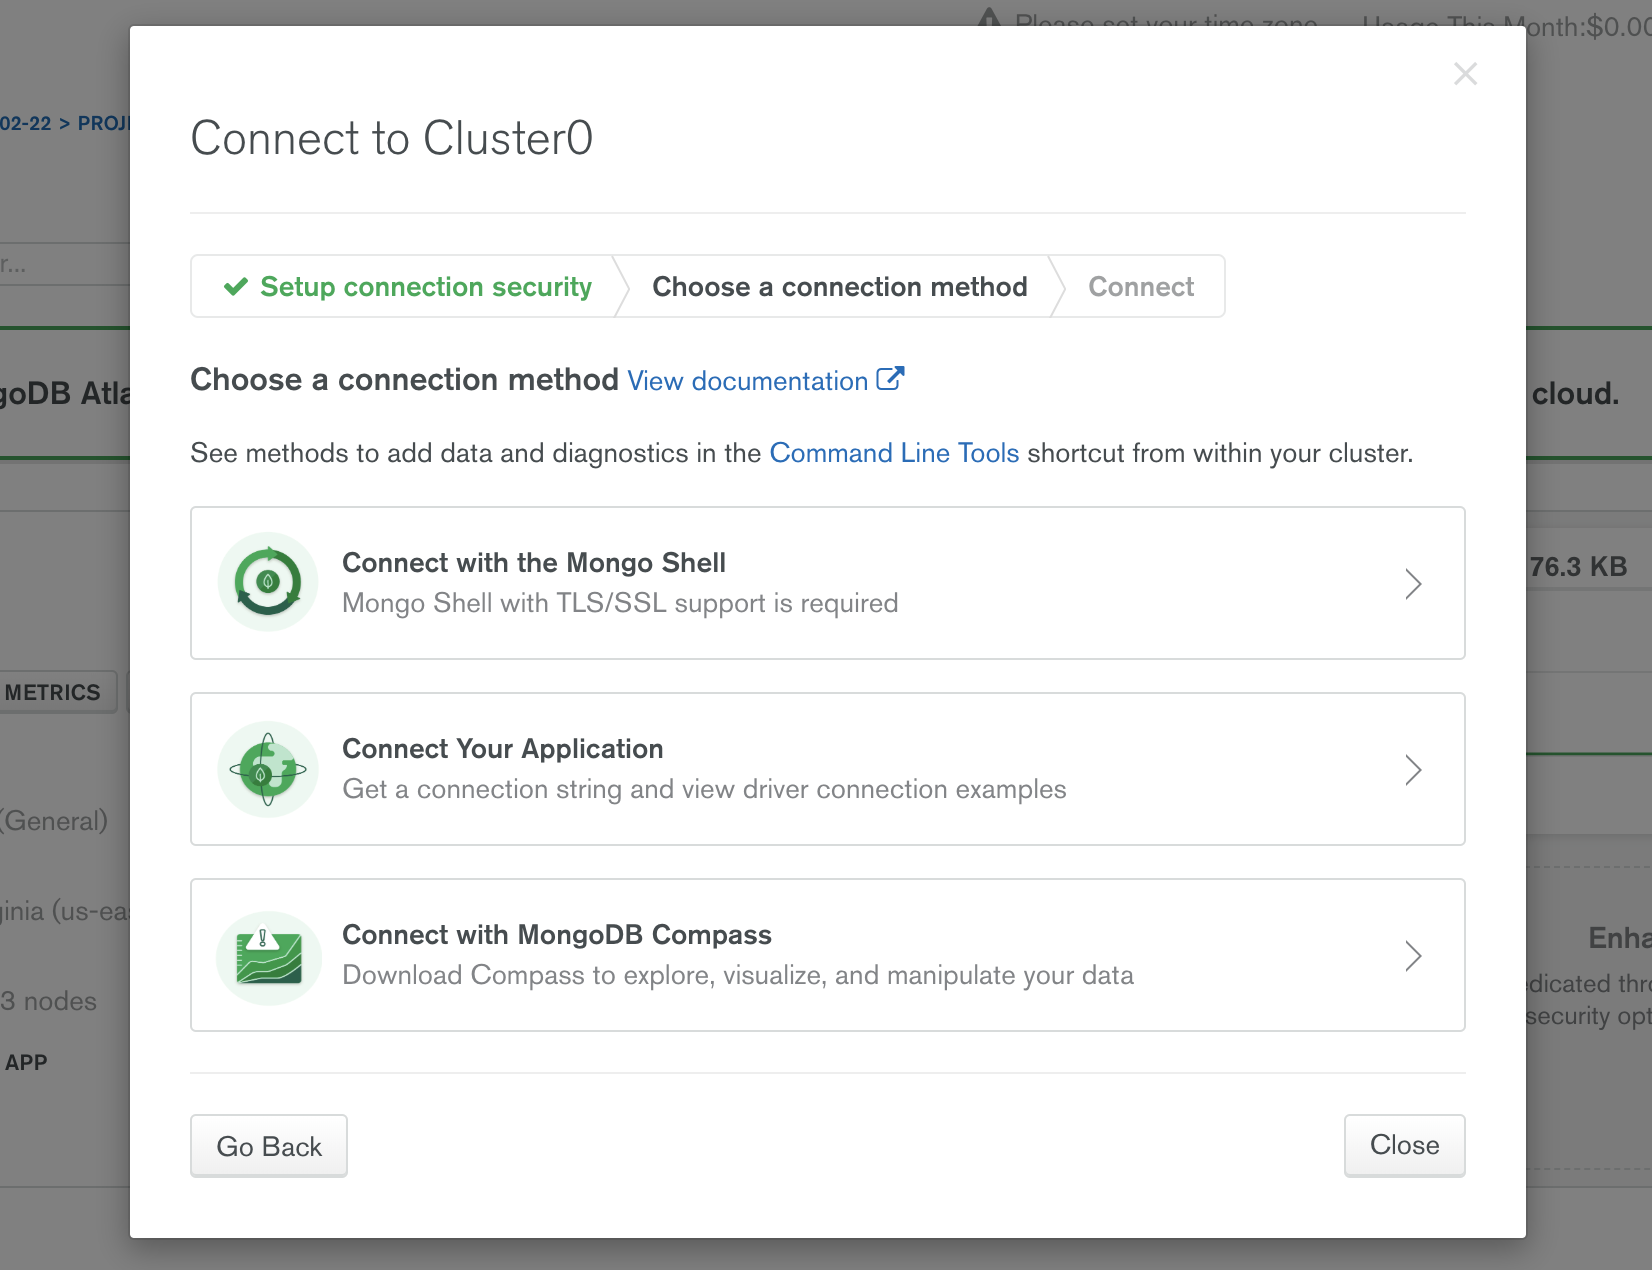
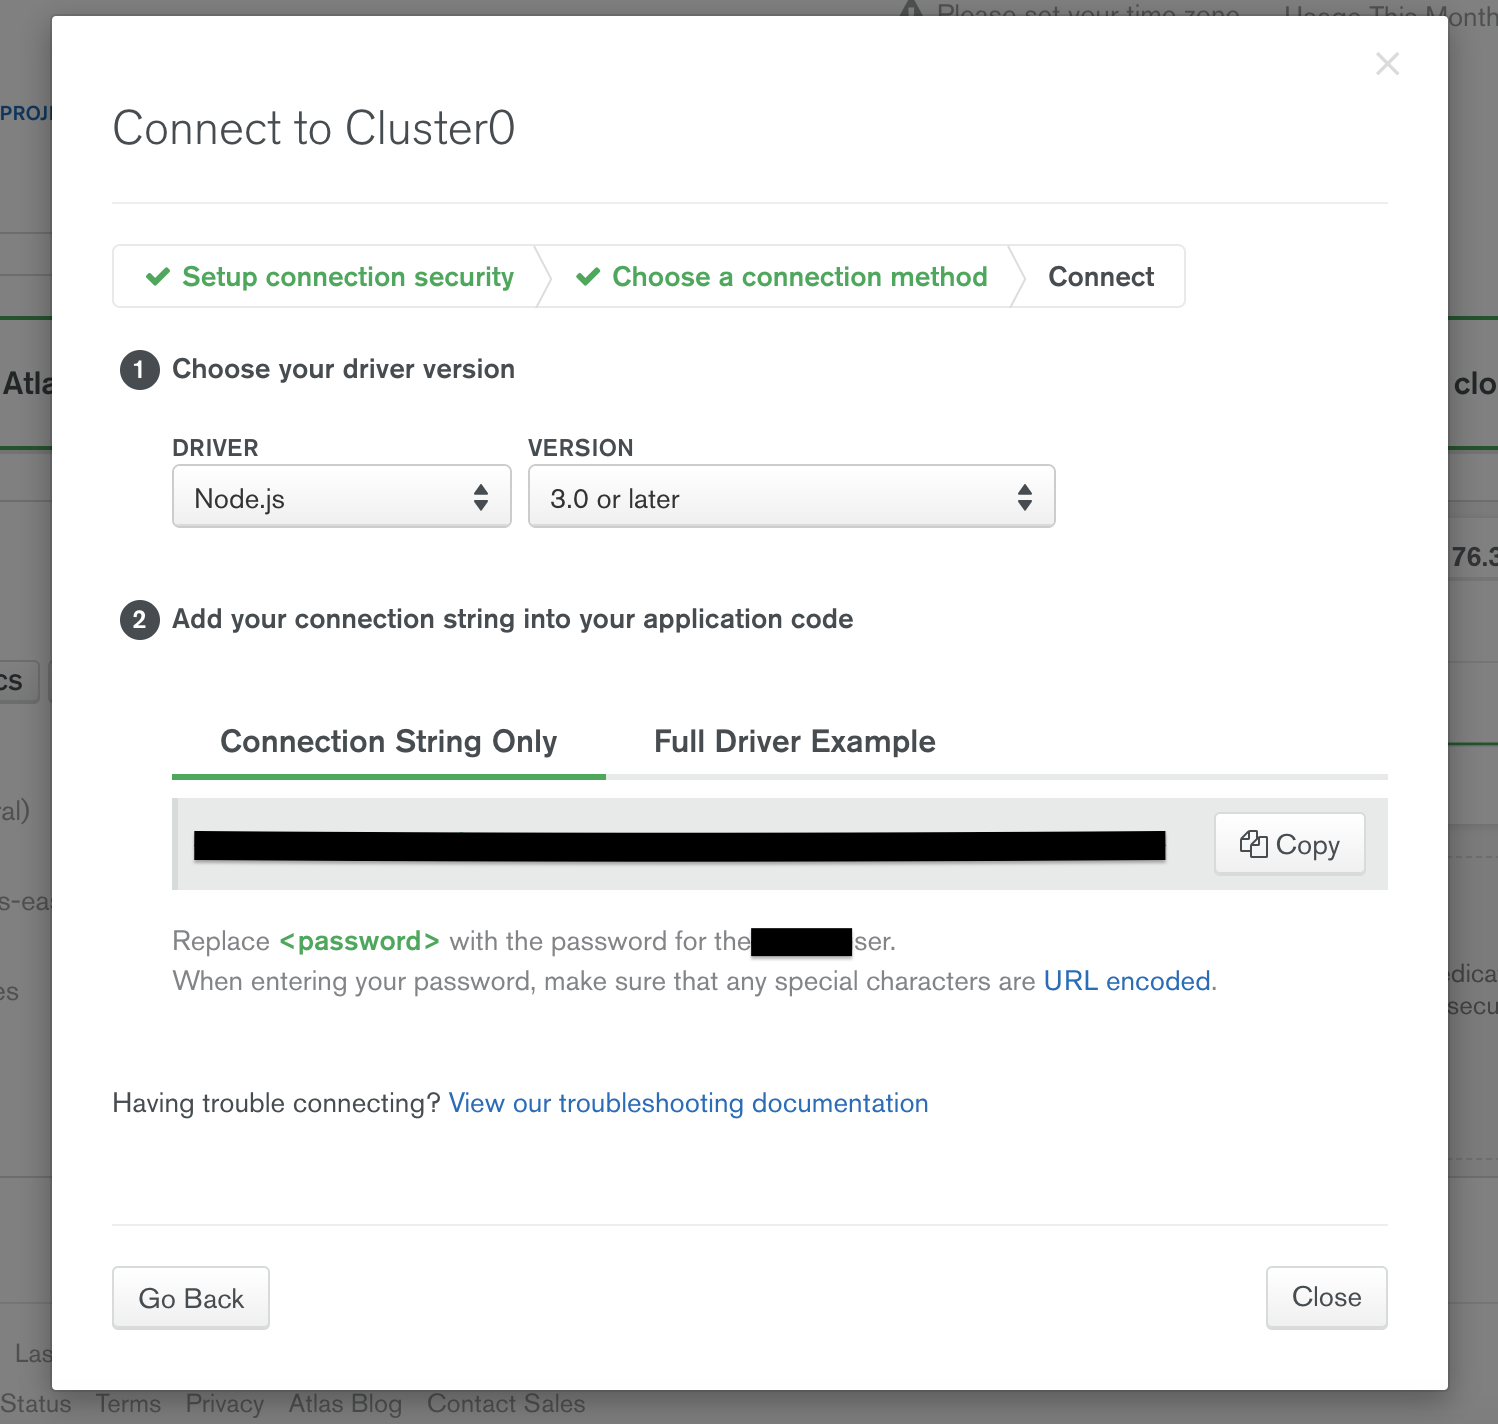
Pull both these repositories on your Raspberry Pi and run npm install in both of them. For the backend, you'll have to set up a MongoDB database. To make your playlist controllable from your phone, without it being on the same network, it important that your database is accessible on the internet. For this mlab (now a part of MongoDB Atlas) is the perfect solution. This is a DB as a service solution and lets you create a remote MongoDB database. If you need help with this, refer this video: How to set up Mongo Atlas database.
Once your DB is ready, get the DB URI from the Atlas dashboard.
Inside the backend directory, create a file named .env and enter these values.
DB_URI=your_db_uri
PORT=8088
Once this is done, in both frontend and backend run
npm startThis will start the backend server and the frontend app at respective URLs. Cross check that the urls.js file in the frontend project has the same BASE url as of the backend server. When you open the frontend app it looks similar to the above screenshots. Just log in to a club, or simply create a new one, and then append ?mirror to the club URL. E.g. if your club URL is localhost:3000/club/myclub, the new URL should be localhost:3000/club/myclub?mirror. This does all the magic!

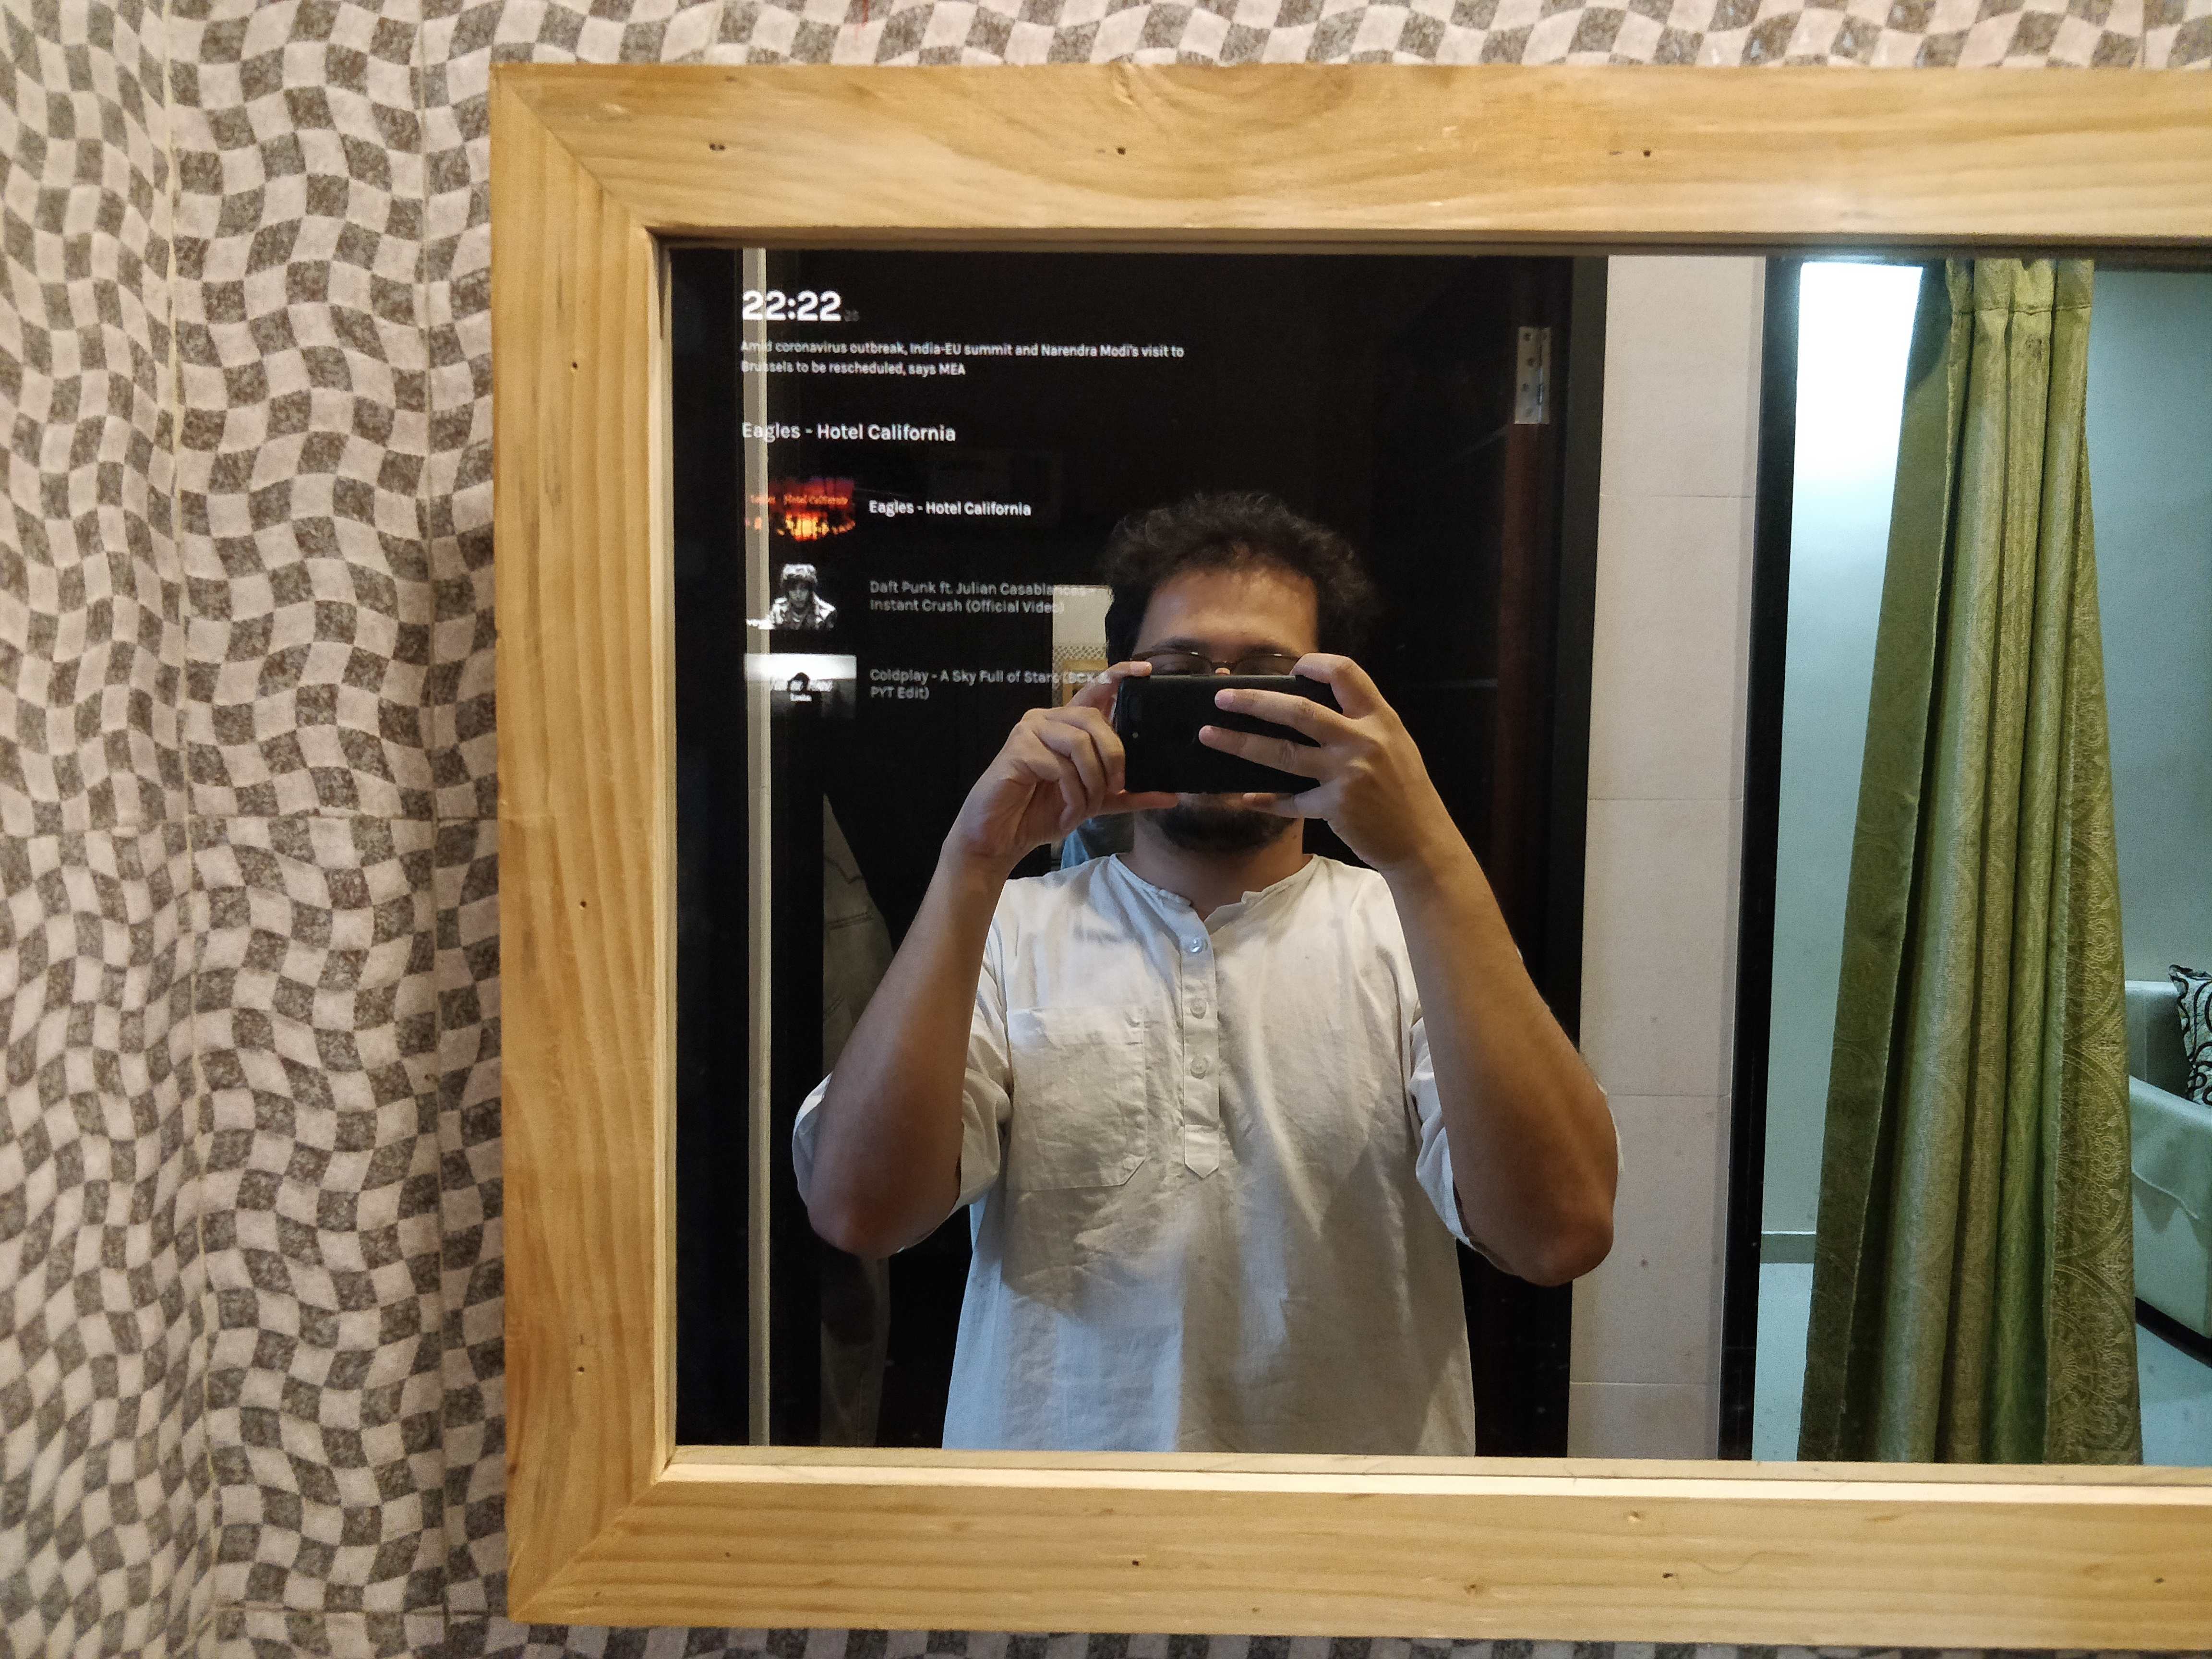
And the final mirror! I also added a news strip sourced from Firstpost RSS feed with some simple animation.
This post got really long towards the end, but I really enjoyed writing it. The mirror's almost smart by now and you can talk to it like any other assistant. You have your YouTube videos up there and some news going. I did not think this series would require a third post, but there is going to be one - one where I talk about how I built a custom Alexa Skill to switch between pages on the mirror. This is still a work in progress and will write about it soon.


